8hrs + 118hrs = 126hrs
Better update the blog for last weekend and this weekend, a few little bits of progress.
So my plan changed a little after a chat with the chaps from Procomp who do the Protech shocks, given I’ve taken the decision to not go with the completion kit I’ve the benefit (?) of being able to shop around for bits, shocks and springs included. So after a bit of asking around turns out Procomp are renowned to be good.
After a chat with the chaps there I was instilled with confidence, pounds weighted for the car, dampers set up with different oil and set appropriately for the weight of the car – sounded good. In the chat length came up, and after a chat it was advised to give fitting some fixed length metal tube in place of the shocks, this would allow a ball park, and the car to be on the wheels and the ride height adjusted.
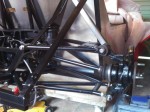
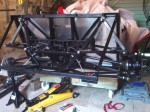
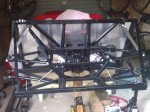
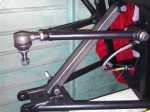
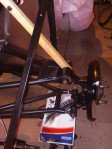
Hence the strange looking metal box section in place of shocks/springs. seems a good idea so far, be great to get it on wheels and get the right length shocks.
that was last weekend anyway…
This weekend went about fitting the diff…
first job was fitting the sleeve, the manual talks about pressing it in, but after painting the diff it wasnt quite a case of pressing, equaly I’d seen some folks ruin their sleeve with to much force. So i went with freezing the sleeze and putting the diff by the heater, still didnt go, even with copper slip…
nearly wedged…
after a little dremmeling of the diff and taking off the paint I tried again, and in it went. Excellent.
now for the bracket, this was pretty straight forward, the paint on the diff left a few drip marks that had set and were a bit in the way – out comes the dremmel again…
but on it went with a tap of rubber hammer.
bolted on, as per the book.
Then came to getting the diff in the car… the book talks about it being a heavy item, and it is. but when I lift it out the car it’s not too bad, and I’m not a burly chap.
I figured I would line up the diff in place, offering it up to the mounts on the chassis which I’d measured up against before. Lining it up and struggling it into place on my own I found it was basically where i wanted it, with the help of a trolley jack, so I fitted a few bolts to the chassis bushes.
Then came the upper diff mounts, much to my suprise they went on okay, I was very shocked to see the chassis mounts, diff mounts and diff line up, not to much wiggling either. So the diff was in, nothing torqued up, but you do need to do everything up pretty well to have it take the weight in the right place. 99% happy with it in, the LH diff mount is perfectly flush with the WF diff mount, the RH side is proably at an angle and a mm out – but only a mm, suspect with use it’s going to bed in so not too worried.
Very happy it’s in the car, first bit MX5 part in.
Laura very kindly brought me a tea, which was much appreciated, and she could see the small developnents.
next came drive shafts. After reading the excellent Rons MX5 workshop manual the drt iveshaft spring clips should be checked for defomity, mine weren’t quite round still, so warranted a call to Mazda. After eventually getting hold of someone who was vaguely useful I had two clips on the way for <£5, not too bad. Always find that dealership folks are reluctant to help, always feels they’re doing you a favor doing anything –there we are.
Fitting the clips was pretty easy, lever off. a little diff oil and wiggle new ones on – hitting hand in both instances -another black finger nail? We’ll see. Was the drive shafts last time, how odd.
diff end was covered in a little diff oil (thanks halfords, perfect viscosity as per the book) as was the diff oil seal.
Other end was wire brushed down and thencopper greased. The hub was wire brushed too, then wiped down, looked okay anyway…
Then came fitting the driveshaft – the Ron MX5 manual referrs to marking the diff and driveshaft so they can re linedup again for refit, I did mark them but in the prepping the narkings had come off pretty much, and I’d rotated the diff input, not sure if that rendered the markings useless. Looking at the driveshaft I couldnt see why tehy would need to lineup,they are slotted and then have indents presumably for oil flow or something similar.
In theory the driveshaft would push in the diff, i found it didnt exactly push, it went in so far and then rotated with the propshaft, but didnt go in further.
I could see the driveshaft hadn’t engaged up to the spring clip.
more pushing, struggling etc, nothing.
After a check on the mx5 forums it seems a little more force may be required. back to the garage..
rubbter mallet and bit of wood and the driveshaft was moving. there was not “click” as i was hoping for where the spring clip slotted into place, but the shaft was butted up to the seal nicely – excelelnt.
The same on the other side, a tad more force, in though… 🙂
the hub end went on fine, a darn site easier than it came off!

