Actually that’s worth pointing out. 560hours to IVA, not 120 or whatever it is you say Westfield 🙂
To be fair that included a lot of MX5 breaking, head scratching and learning. still 560hours…
Actually that’s worth pointing out. 560hours to IVA, not 120 or whatever it is you say Westfield 🙂
To be fair that included a lot of MX5 breaking, head scratching and learning. still 560hours…
20hrs + 540 = 560hrs
A bit of a push here before the date of the IVA, the 16th November 2016 (most don’t need to specify the year in my build, I do)
All manner of little jobs went on in this window of time, lots of “little” and “final” things, many of them taking a while and being pretty key.
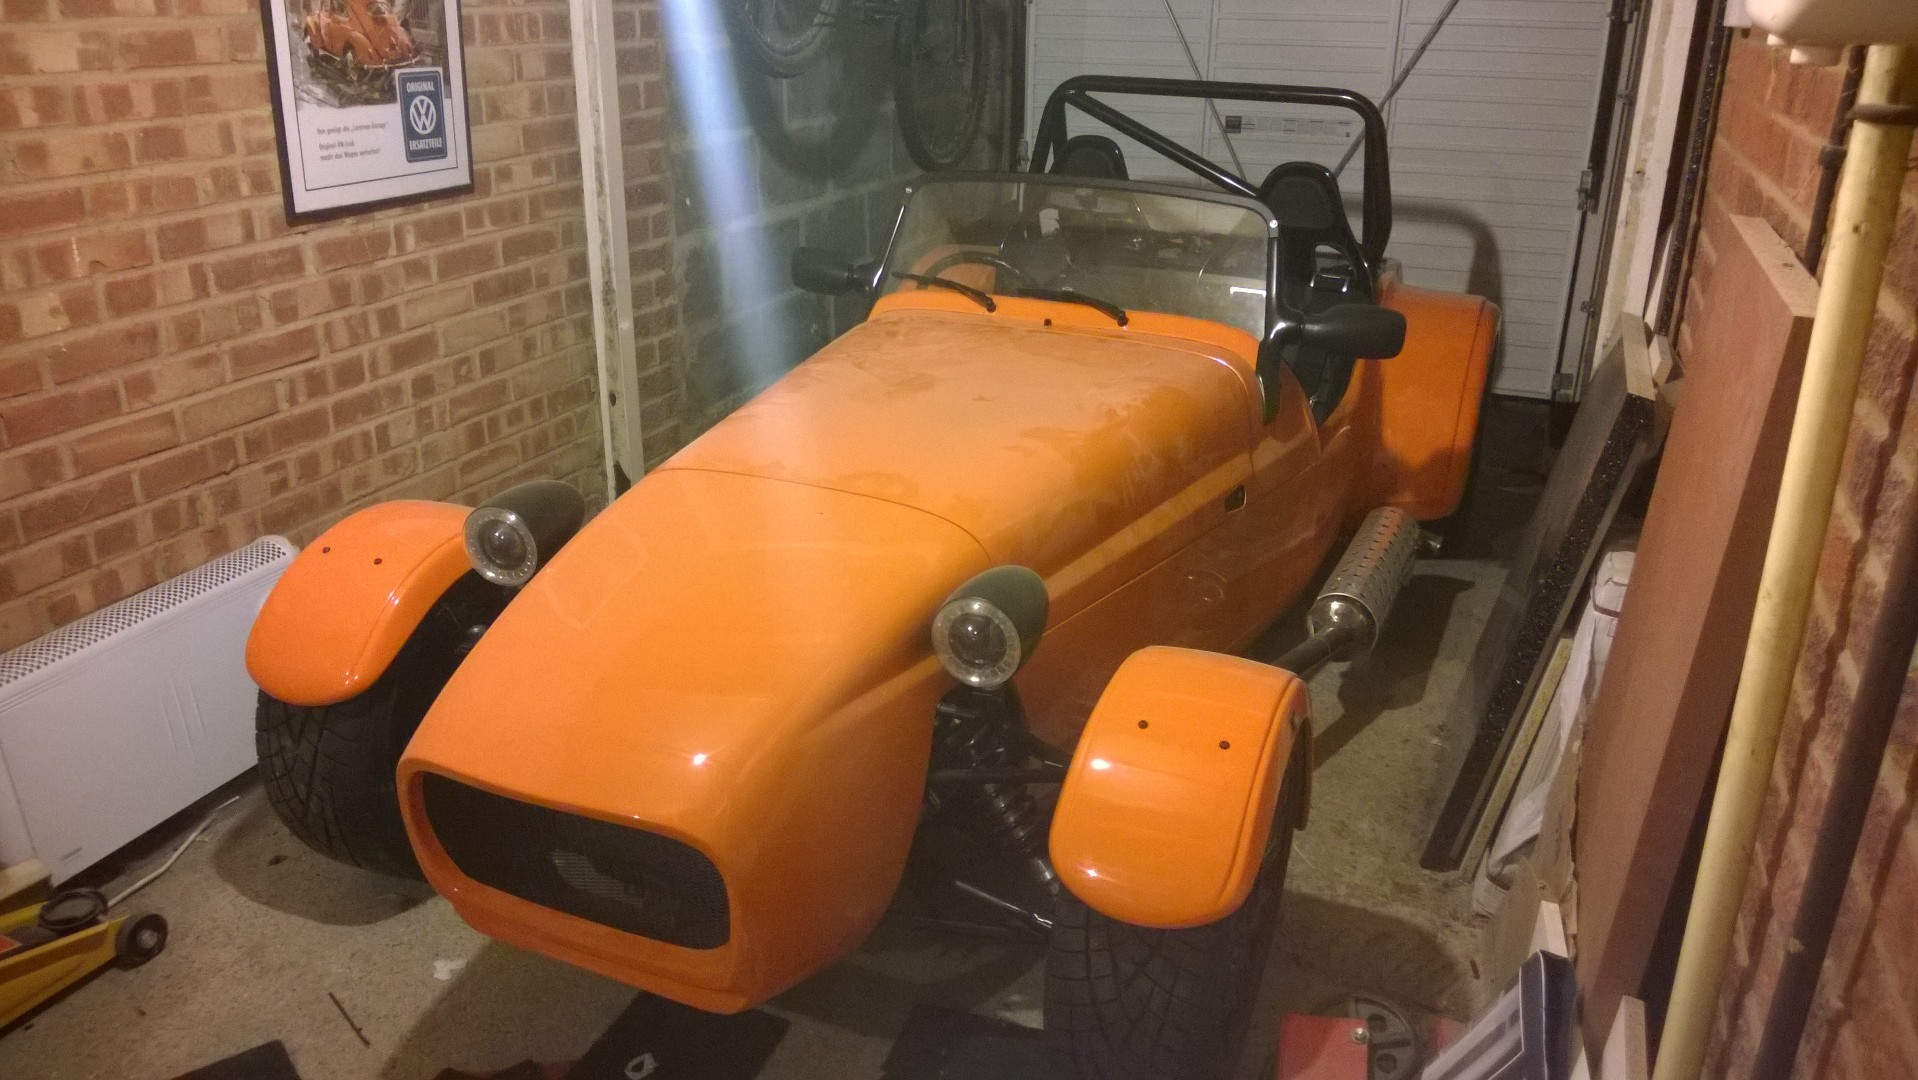
One you’ll see a lot in pictures is the means of attaching the bonnet to the tub, in my instance Aerocatches, I liked these as soon as I saw them.
What I eventually ended up doing was getting the inside fitting versions as in reality these are the only sort that will fit if you want to mount them low on the bonnet, this wasn’t clear to me until I went to fit the outside mount ones – doh. Im sure il use the outside mount ones somewhere else on the car in another lifetime.
This job did take an age as everyone said, but to be honest was no more or less fiddly than, for example the fillet and wipers. I’m pleased with the finish of the catches though, and they feel pretty solid.
While I was getting the final bits together and the 16th Nov drew closer my expectations changed a little. I initially booked the IVA a while ago with the expectation of getting as short a fail list as possible to make a pass easier. As my outstanding job list got that bit shorter I thought there was a little chance I could get near a pass. Hence you will see the connector for the lambda sensor. After the previous emissions fail I’d changed a few things, but not the lambda sensor, I didn’t plan to do so either, but as the list of jobs was getting smaller I did so.
In the final week before the IVA I went page by page through the manual, even bought a radius gauge – still not really sure how it works… rubber trim went on most things though. What I did find were a few nuances though. Like the rear fog light needs an indicator light for when it’s on – clearly I didn’t have one. My options were to ignore that section (!?), add/reuse one of my warning lights, or, as I did, rejig the wiring on the rocker switch so that it did not light up with the side lights as everything else did, but it lights up when the fog light is on – after a bit of head scratching this was easy enough.
Pics of the main fun below…
16th November info to follow…


40+500 = 540
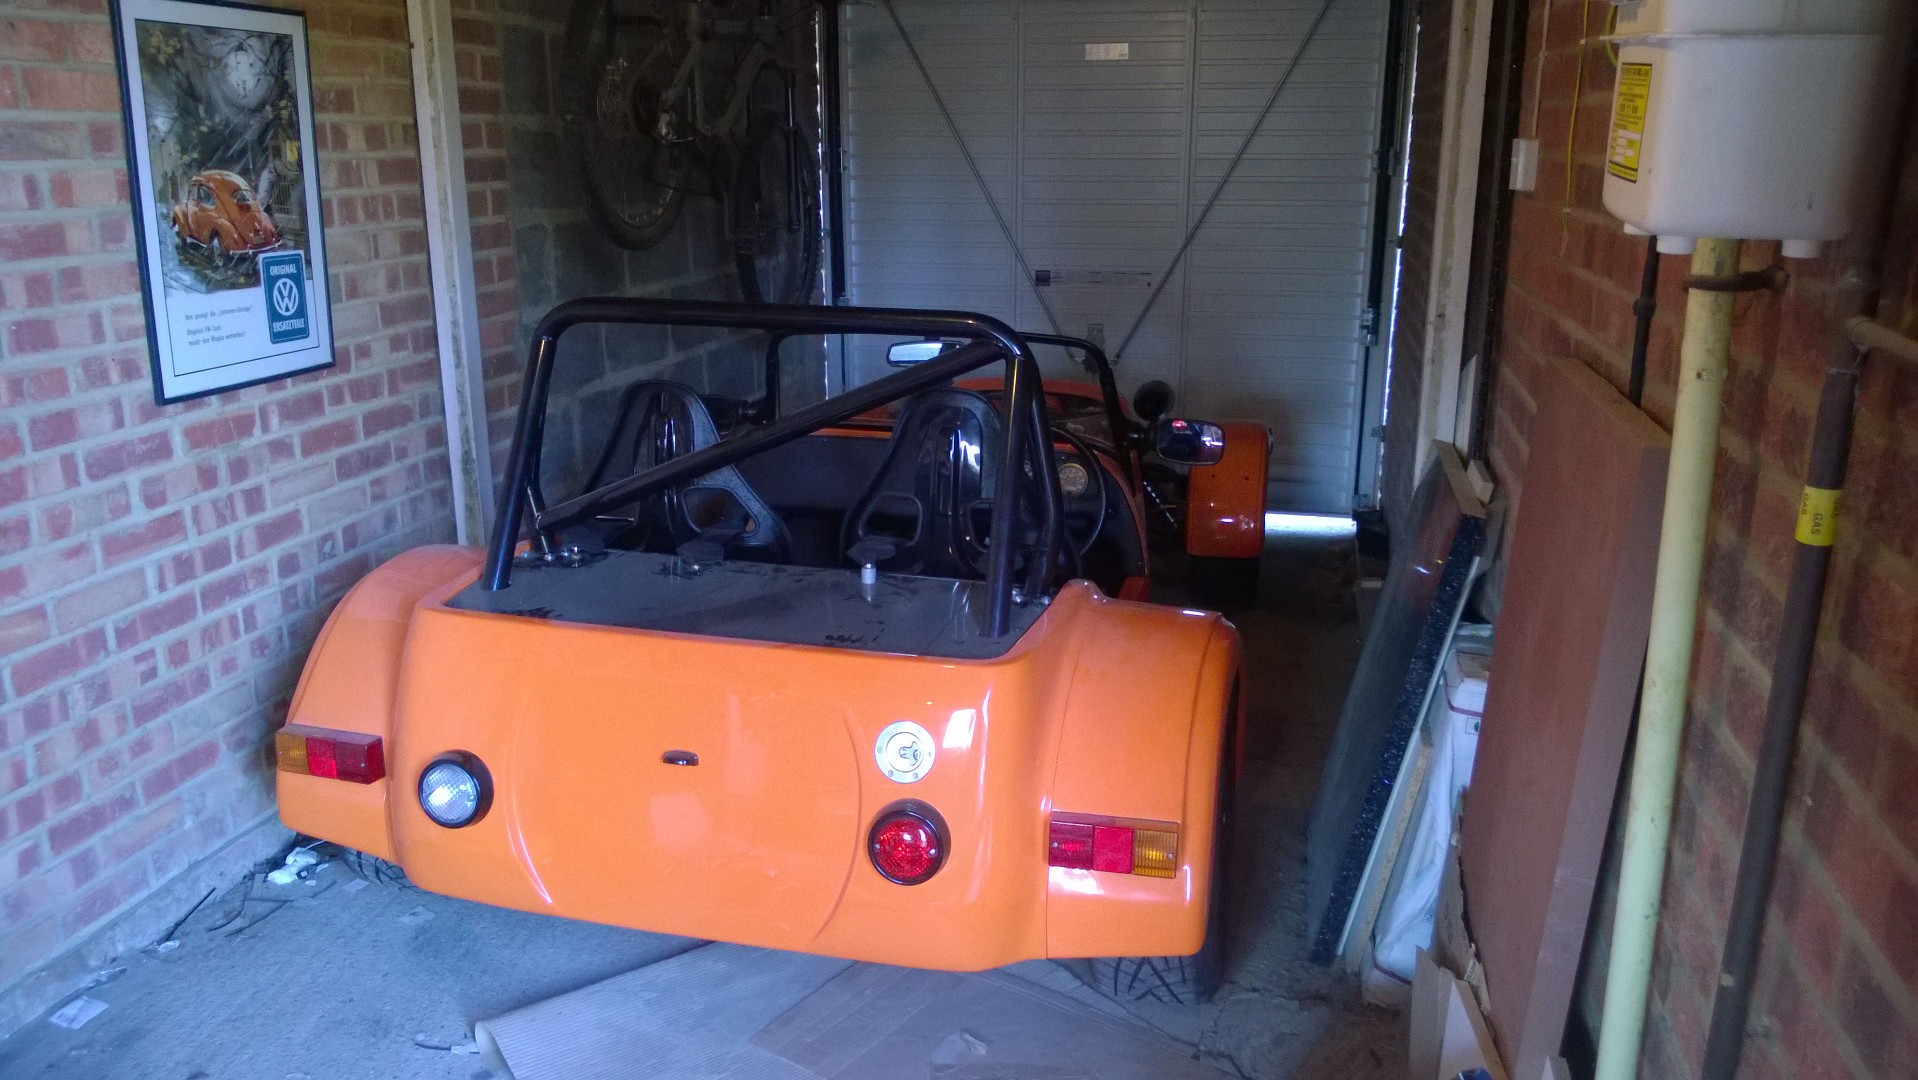
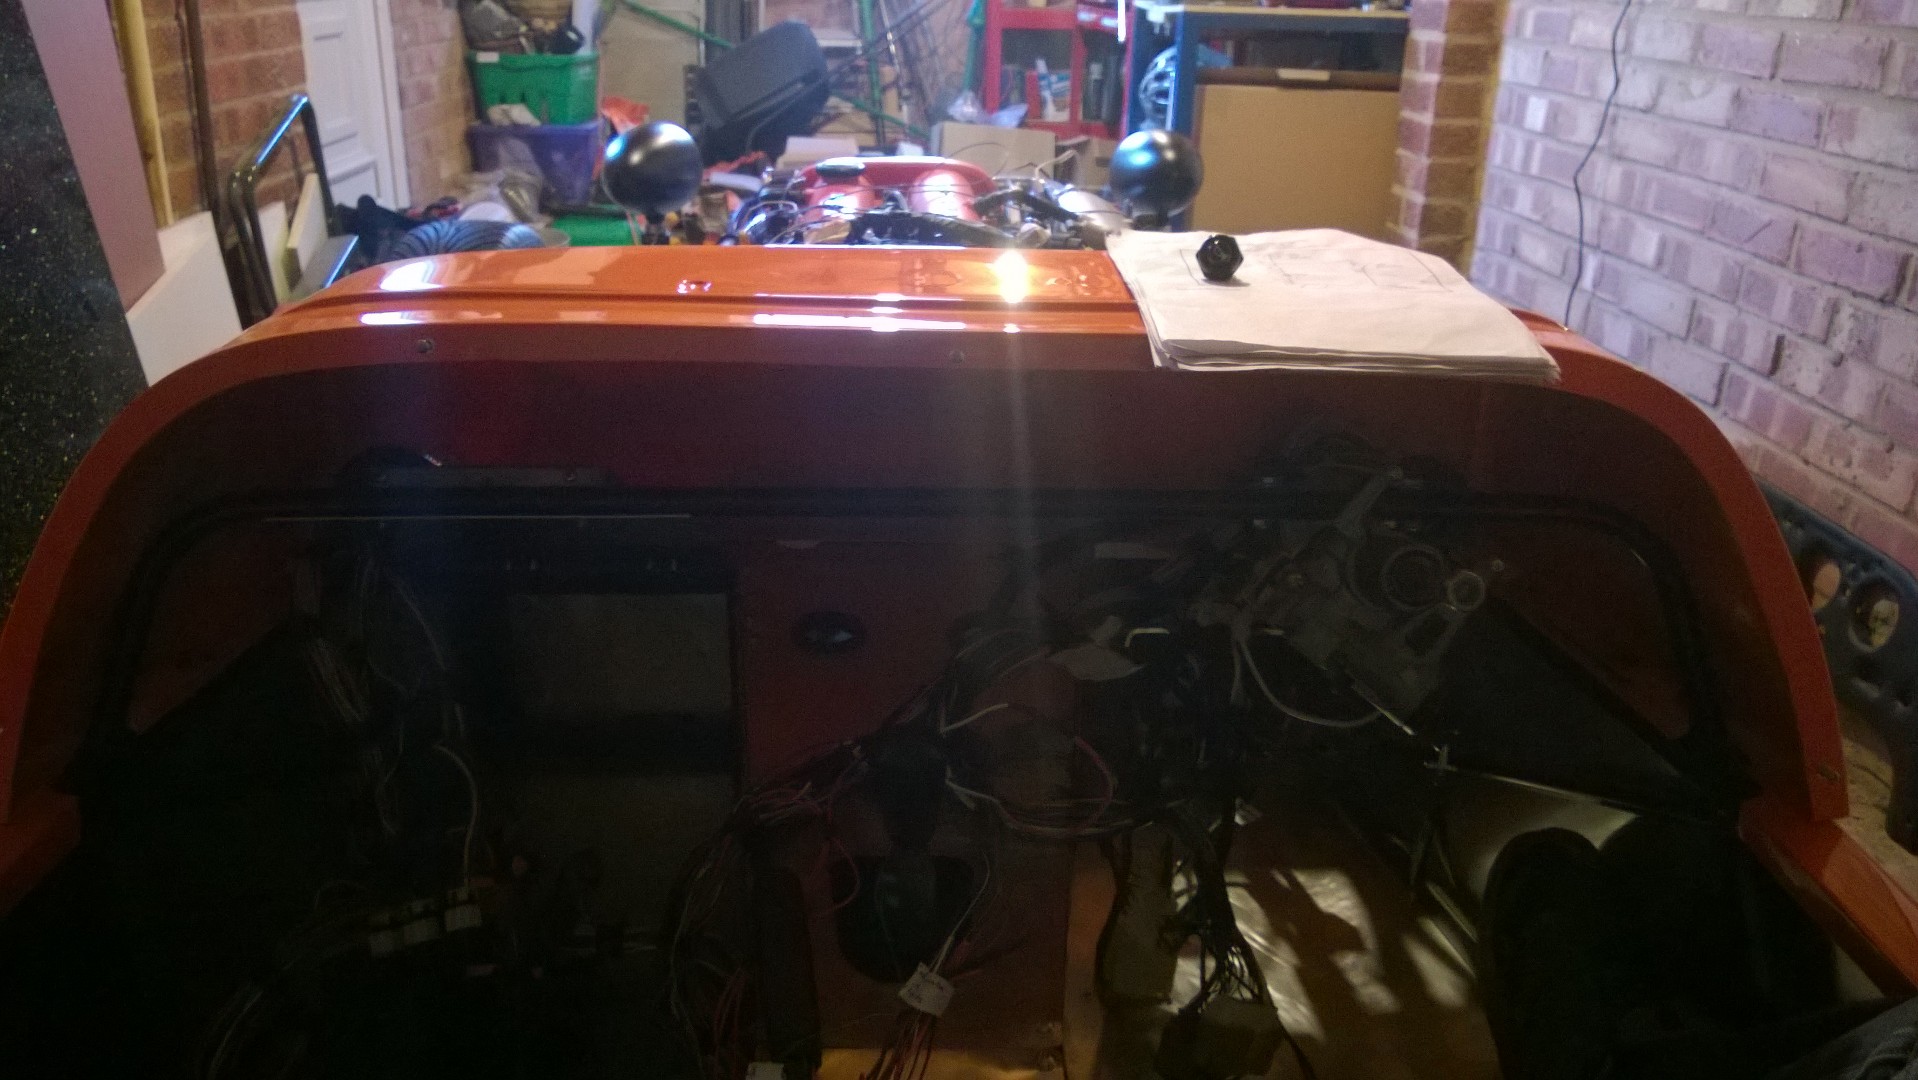
Wow, another 3 months have passed and no updates… doesn’t mean no progress though 🙂 Albeit slow progress, so a bit of a brain dump and a selection of pics to keep everyone up to date. It’s been a good few months for visible updates, sometimes (wiring!) you spend an age and feel like you’ve nothing to show for it – in this block of time adding the rollbar, carpets, seats etc has made a very different looking car – the rollbar specifically really “balances” the look of then car IMO. Anyway, here we go on a little summary of my garage adventures…
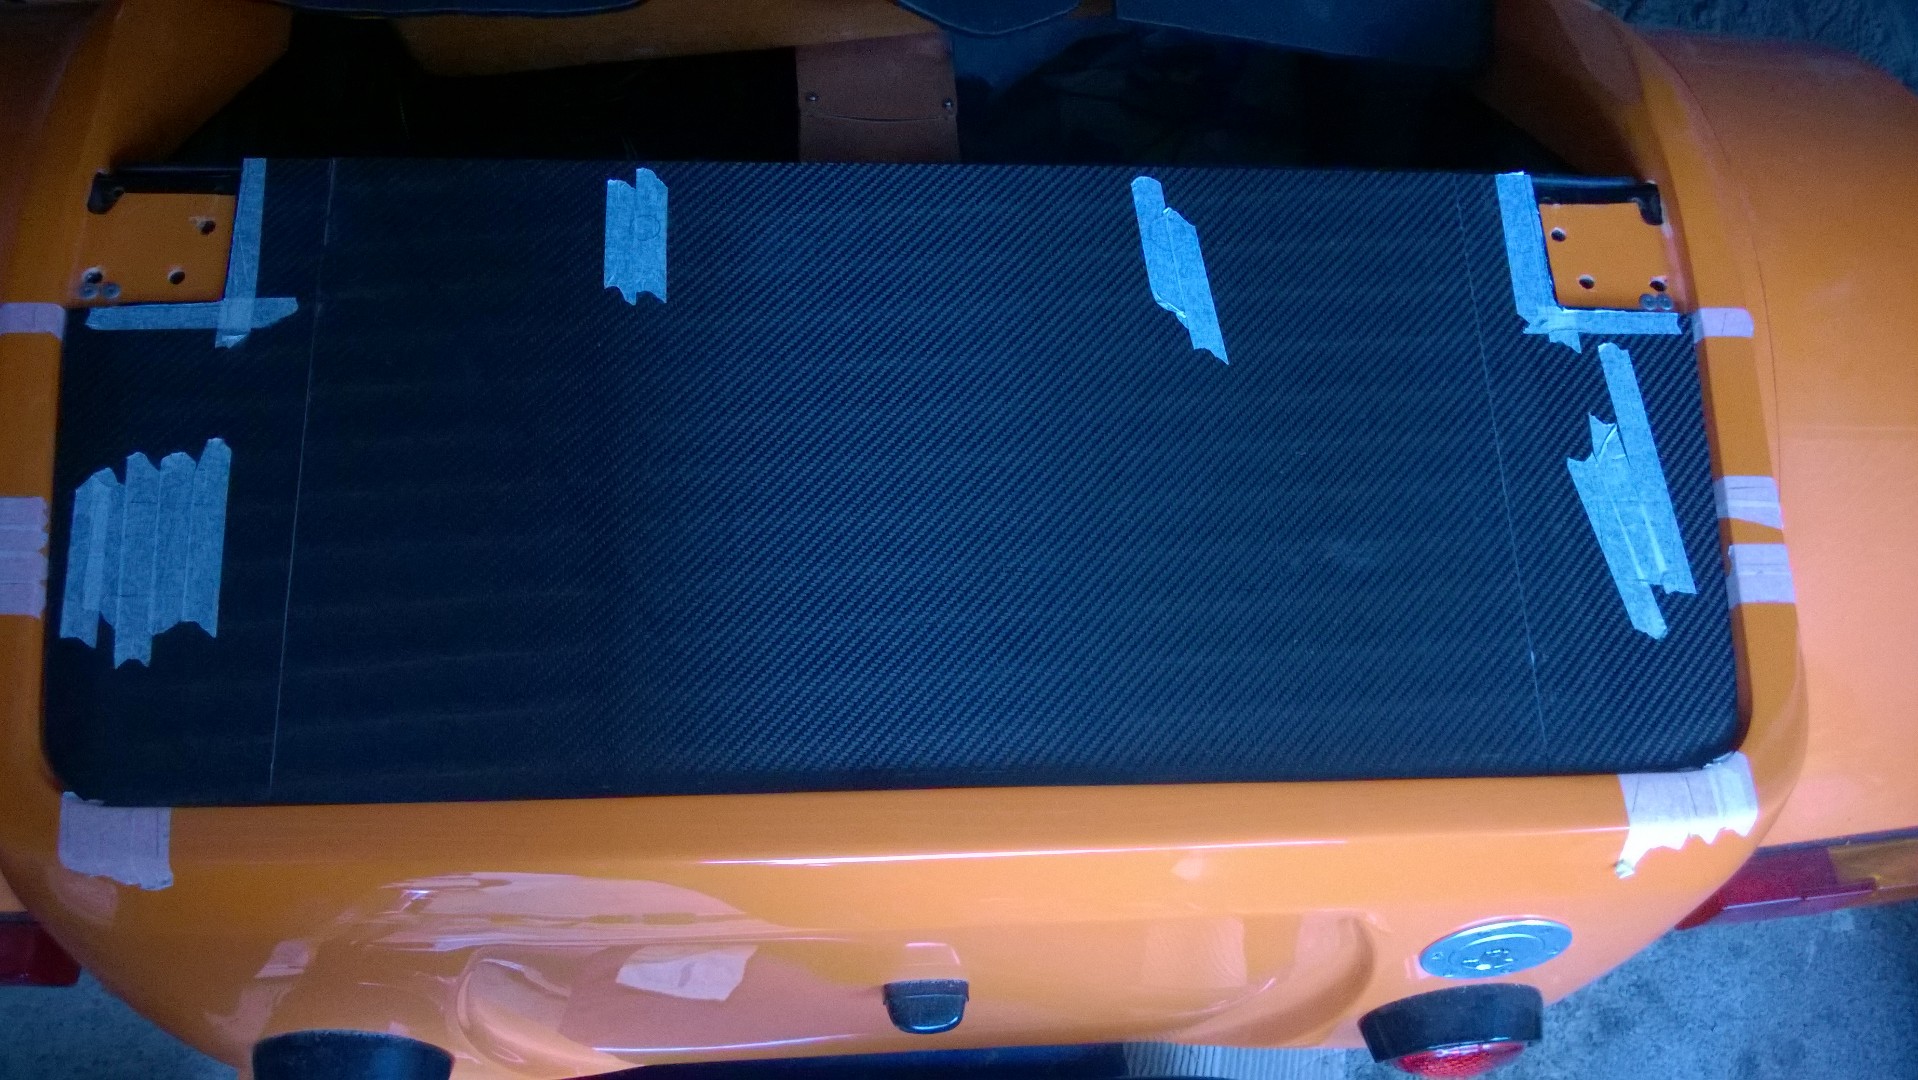
Last post I had a few pics of the beautiful carbon fibre sheet that Mark at Carbon NV made for me, and a few pics of how I’d started chopping it up. As im sure I mentioned, I oped to go straight to a carbon panel (my ultimately plan) rather than utilise the WF boot box because I thought it would be easier… silly me. Anyway, after a lot of measuring, chopping, measuring and general fettling and I do not know how many hours I’ve a 3 piece CF panel that fits nicely in the boot box area – does it look like a new BMW panel finish? No, but I’m really quite happy with it given it’s hand made, hand finished (by me), nothing is symmetrical etc.
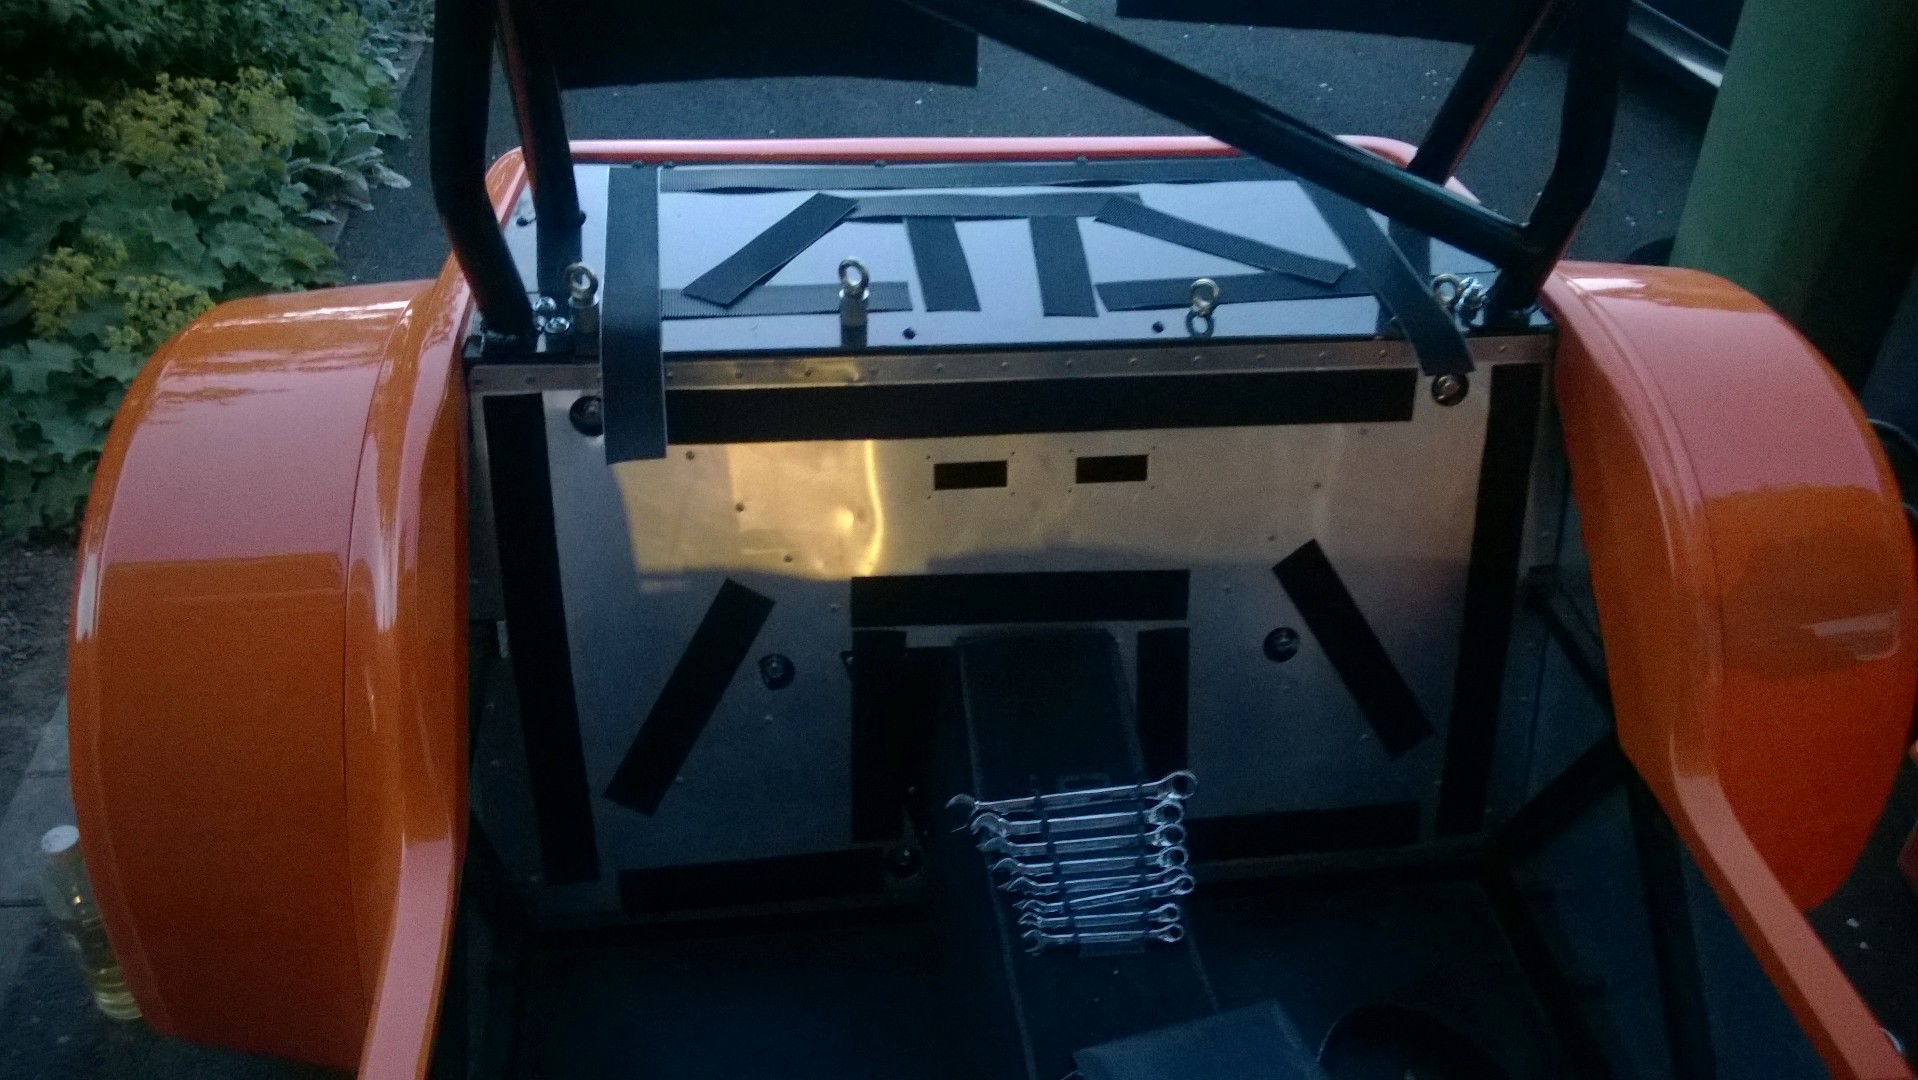
What was fun and games was doing the bootbox cover, the rollbar, and the harness eyebolts – you can’t really fit one without consideration of the other, nor can you really fit them all at the same time. What made this whole process 10x easier was a set of small ratchet straps, this meant I could pull in the rollbar stays and drop the rollbar in and out relatively easily, something I must have done 10+ times through increasingly big holes in the boot box. So after a lot of fiddling, some bulky drilling in the lovely Playskool MSA bar they’re all fitted. And I should callout the fitment of the Playskool bar is excellent, very little tweaking needed and very sturdy feeling – and it looks great. Somewhere I have a nice Playskook MSA sticker, god knows where that is – perhaps in the same safe place as the other safe bits I keep!?
With the bootbox cover in and rollbar in you need to mount harness eyebolts. For what I’m doing with seats (JK compsites both sides, driver side on runners – this is not uncommon) I need to raise the harness eyelet height a little to meet some IVA height requirements, this means some spacers – sourced through the WSCC! So a pedant will see one seat is a little higher than the other, they will also see the eyebolt is sat higher (but still threaded enough into the chassis)
Carpets… another nice job. One that did not take an age and make a nice aesthetic job. What did surprise me was how heavy the whole carpet set is, there is quite a thorough set too giving a good finish. And when I say good finish you’ve got to be impressed with the tunnel carpet, there are a lot of undulations in the tunnel – the carpet fits brilliantly. What I did have to do was make some holes in the carpet for gearstick, handbrake and holes to get seat mount bolts in, this was a job for the Stanley knife and it turned out that rough cutting and shaping to get it in place was the key, not super accuracy! And to add to the weight of the carpet I used 20m of heavy duty Velcro to secure it all down, it’s definitely stuck.
What I do need to work on are some surrounds for the gearstick and handbrake, the leathers came with the carpet set and need something to secure them to the carpet, I toyed with stitching but after seeing some amazing jobs of doing this I know this will not play well to my strengths – surrounds it is.
What’s next? dash tidying so that I can seal it all up, but first an annoying problem. After testing my wipers with a little watering can I found 2 things… 1. the wipers want to wipe down, i.e they are going the wrong way, towards the scuttle, not cleaning the windscreen – argh! so the solution here to some stupid oversight on my part is to turn the wiper boxes the other way up (or do something clever with a cam in the wiper motor apparently. Now the wipers were annoying the first time, let alone again. And to add to my frustration was point 2. the wipers leaked water into the scuttle – conveniently over the ECU and the imobiliser! So after a bit of fiddling to redo the wiper boxes, with a lot more sealant and another stab at the wiper rubber bits I have a better seal and there is no torrent of water into the scuttle. I say better seal, speaking to those on WSCC getting no water in is pretty tough, and that’s what I found, after several attempts with sealant I had some in – but my testing did involve using a watering can over the wipers, so pretty artificial.
Next dash in, wires all finally bound up, and secured down – that was nice to do a few things up, rather than keep putting the steering wheel on and off to take the dash on and off. Something Gary KugaWestie had done was add some connectors to the dash wiring to enable him to remove the lot with a couple of big connectors – when I do any form of dash upgrade this is a must!
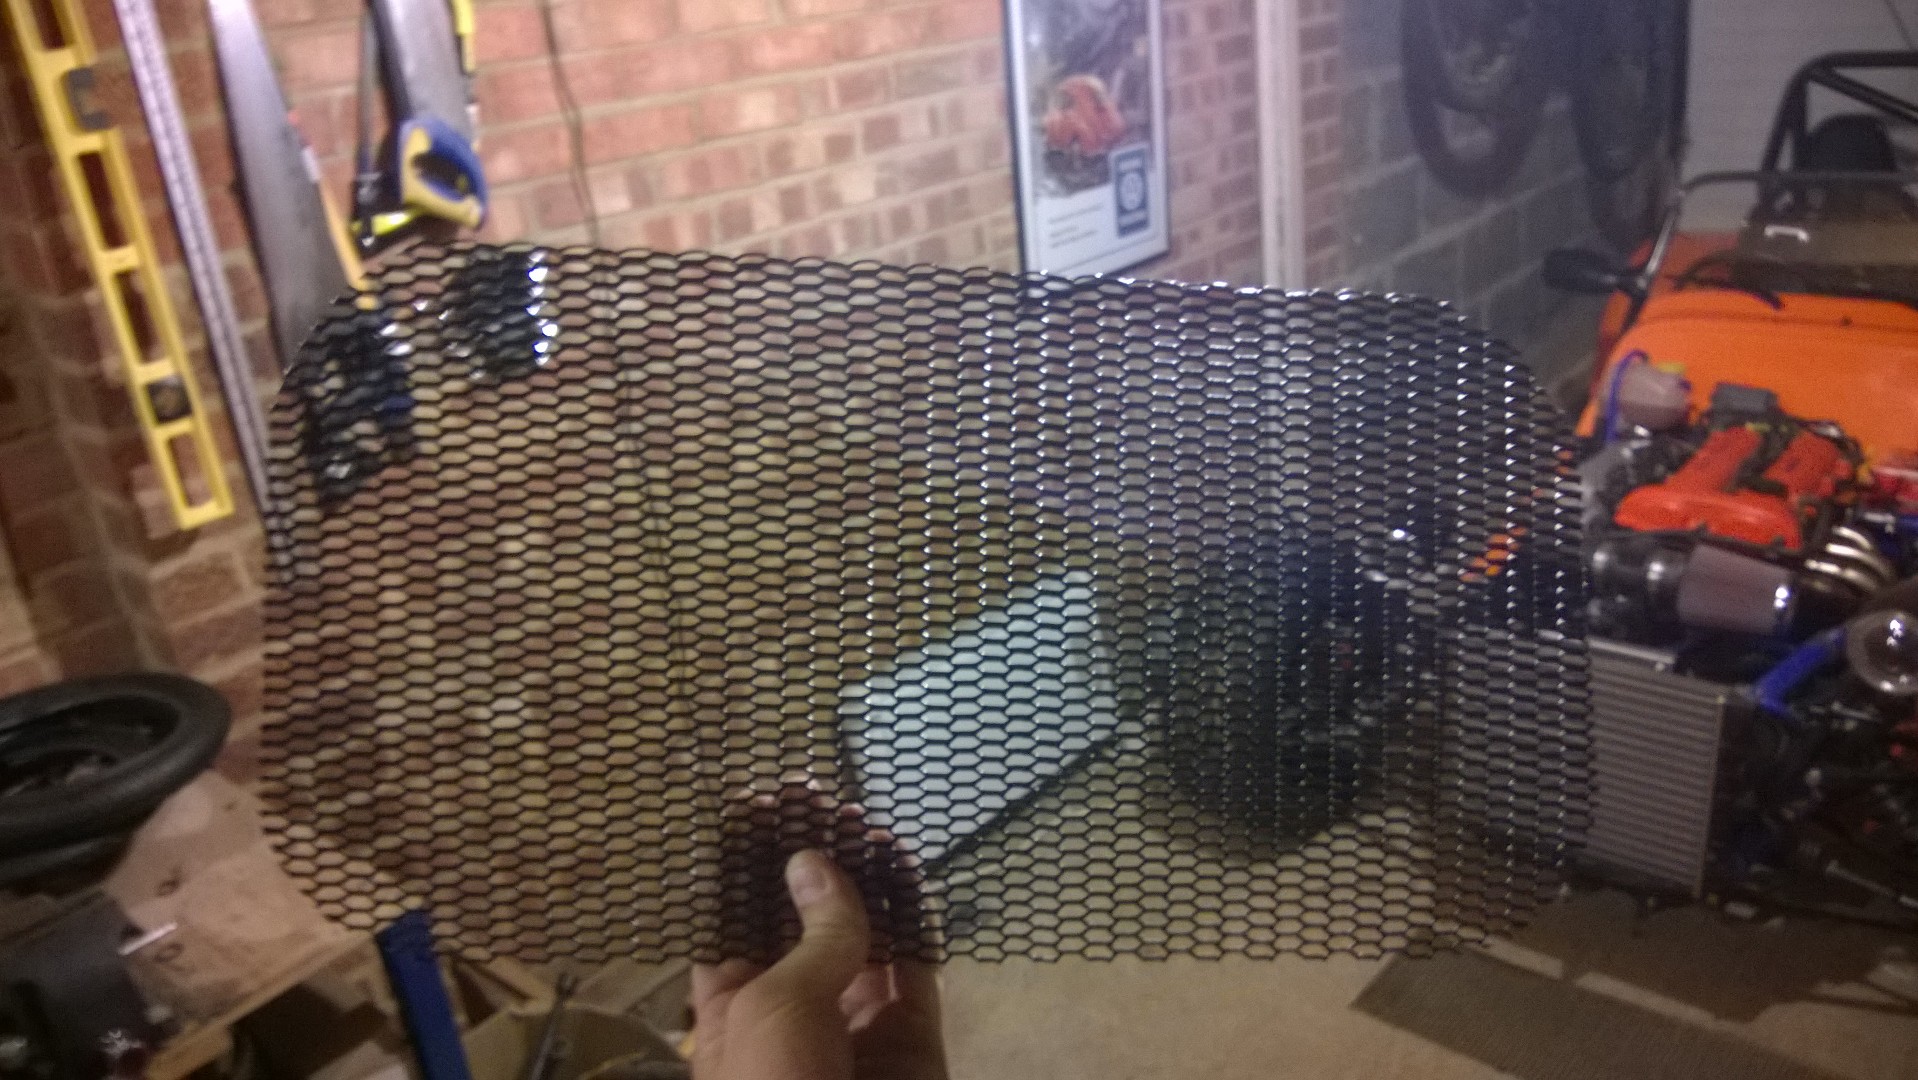
Nose cone grille, I ordered some nice black mesh from car builder solutions, I hoped this was going to be an easy task, wasn’t too bad. chopped easily with wire cutters, one can attach to the inner nosecone with holes and small cable ties, I wanted to do so with no visible cables ties. What I did try was cable tie saddles silkaflexed to the inside of the nose – but these ripped out when I tightened the cable ties up 😦 Then after a search I made little blocks of wood around 3cms sq, drilled in the cable tie saddles and then silkaflexed the wood to the inside of the nose, a much better bond and it doesn’t pull as much on the silkaflex, much better! mesh in!
Harnesses went in a the same time as the lovely seats from JK composites. They are indeed very comfy as everyone says, especially when sat in your lounge – not done any long journeys yet… The harnesses are playschools RaceLidsz ones, are nice and wide FIA approved and tighten up by pulling “in” which is handy in such tight confines. I am sure I will get used to this, but getting in and out is a skill im sure, currently I keep sitting on bits of harness, or when in can’t get them easily, sure there’s a knack…
Currently I’m mid way with the cycle wings. There were two options for me here, either the book way – bolts through the wings into the stays, or using fibre glass and “big heads” to make securing not visible externally. My plan all along was to go the “big head” route, however with time going on, me quite liking the black annodised hex bolts and one day wanting carbon fibre cycle wings I’ve gone the bolt route. One is nearly done and looks fine – the stays did need a bit of a bend, after a bit of reading the solution was levering them with a big long bit of wood – everything else I tried (elongating holes, hitting, etc did not work 🙂
Final comment on this post is the day the car left the garage 🙂 Thanks to the very helpful people at the local Ford garage the WF had its second go on their flatbed (first was moving house you recall). This time down to the Ford garage for headlight aim, brakes and emissions. “2 out of 3 aint” bad as has been said. Headlights were promptly pointed in the right direction, if a little down by default. Brakes were – and I quote “spot on” – which I was happy with given I refurbed the calipers with new everythings – and I am on a very steep learning curve! Anyway, breaking evenly in all corners.
Emissions… it did not pass here, no matter how many goes we gave it, HC, Lambda were fine, CO2 not, and only at “fast idle”. See here for the full story
http://forum.wscc.co.uk/forum/index.php/topic/121011-pre-iva-emissions-fail-any-pointers-please/
What I suspect was the issue was either that the lambda sensor was not at all tight, only finger tight at best, and that there were some takeoffs on the intake side that were not in terribly well. What I am deciding (rightly or wrongly) to do is have another go on the emissions machine before IVA, it was a bit of a pain getting the garage to get the car, so with the steps taken hopefully I should be okay!


65+435 = 500hours
Five hundred hours!? say it fast and that’s okay I think. Where does the time go? both in terms of me updating my blog and working on the car. getting there though…
All sorts in this update, early on sorting some more of the wiring, not sure what to say here, it was just relentless but eventually I’ve something that works all the electronics on the car. Dials, switches, lights are in, the dash is now in too, looks rather good if I say so myself.
Great to see all the switches working, lights etc all doing as we’d hope, even the tacho works – some calibration to do on the speedo.
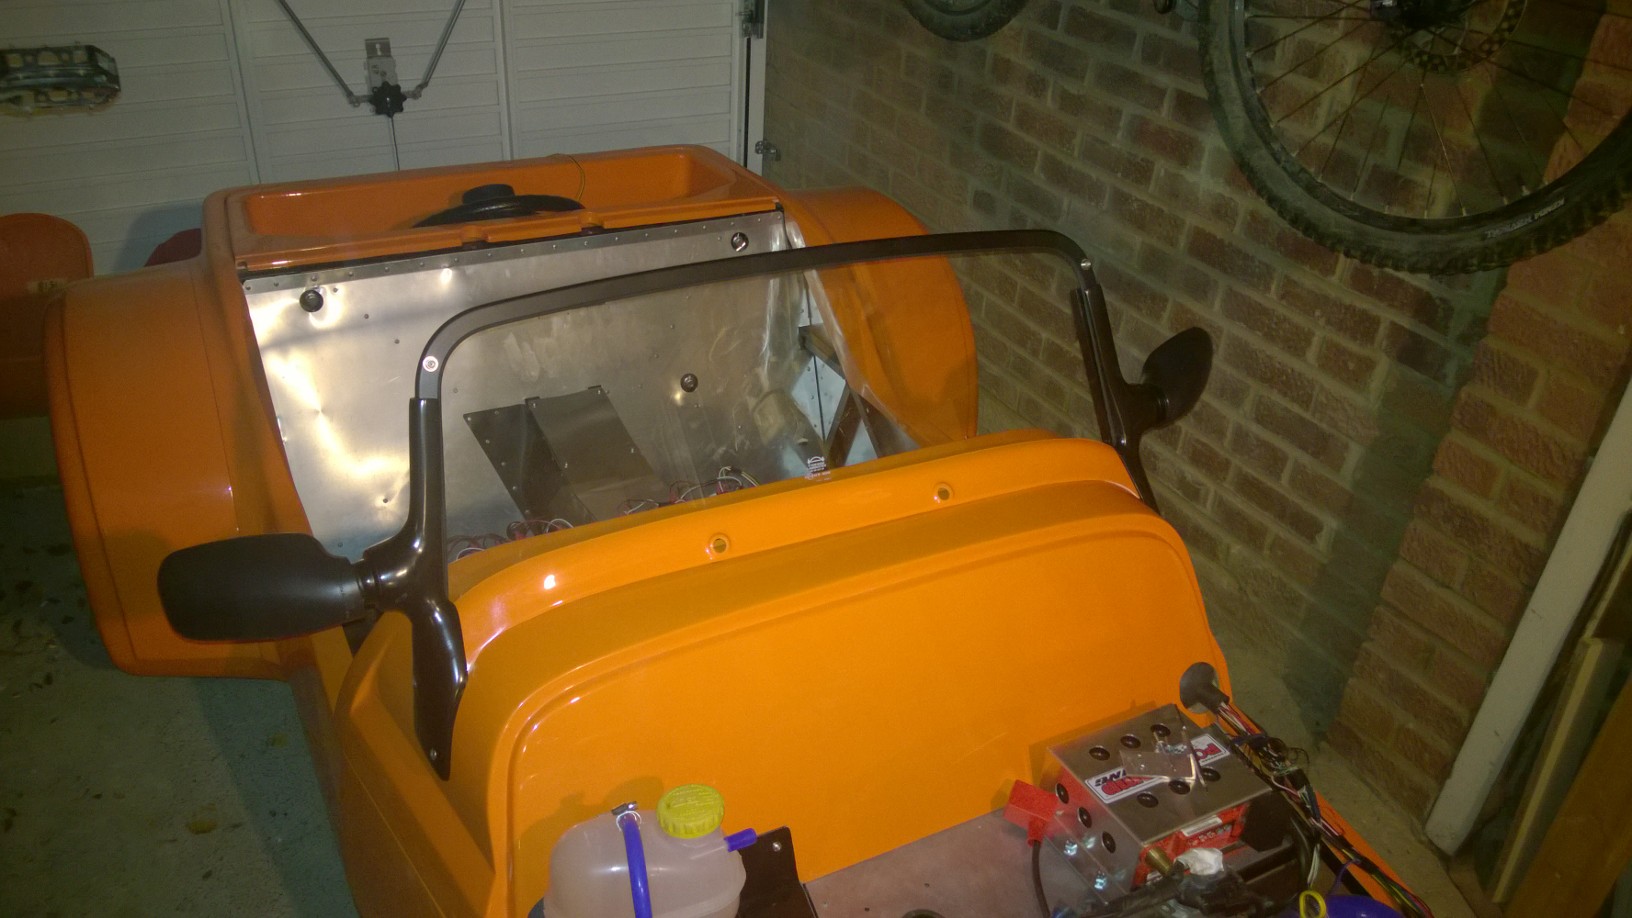
Next on to the windscreen, arrived in an expensive wooden box (I recall you do actually pay for this :))
Fitting the windscreen was one of those jobs that makes a big difference, but to be entirely honest wasn’t that difficult (I will cover the fillet in a moment…). With help from the wife it was manouvered in place and the windscreen pillars fitted with the 4 bolts. with a little help from a wooden pole with a few markings on it to ensure the windscreen rake was right.
The fillet. What can I say that covers it or helps anyone else. The manual says it may need trimming – not incorrect. It must have gone on and off 25 times, my tip would be to leave only a small amount of fillet poking inside the windscreen pillar, not trim it down mm by mm. It does flex quite a bit so at least that was a bit forgiving.
Wiper motor and wheel boxes? not a lot of pain here, but there was certainly some fettling to do to get both the wiper boxes, rubber mount things and the fillet sitting anywhere near correct. I did still end up with one wiper arm at a different angle to the other, but a look at Stoneleigh shows me they’re all like that sir.
At last I’ve started the fitting o fthe lovely playskool MSA bar, and it was very simple instructiions to fix, also changes the look of the car, just a bit of grunting and swearing to get the holes to line up. Also a set of ratchet straps are key here it seems. Trial fit didn’t have these, that was a pain.
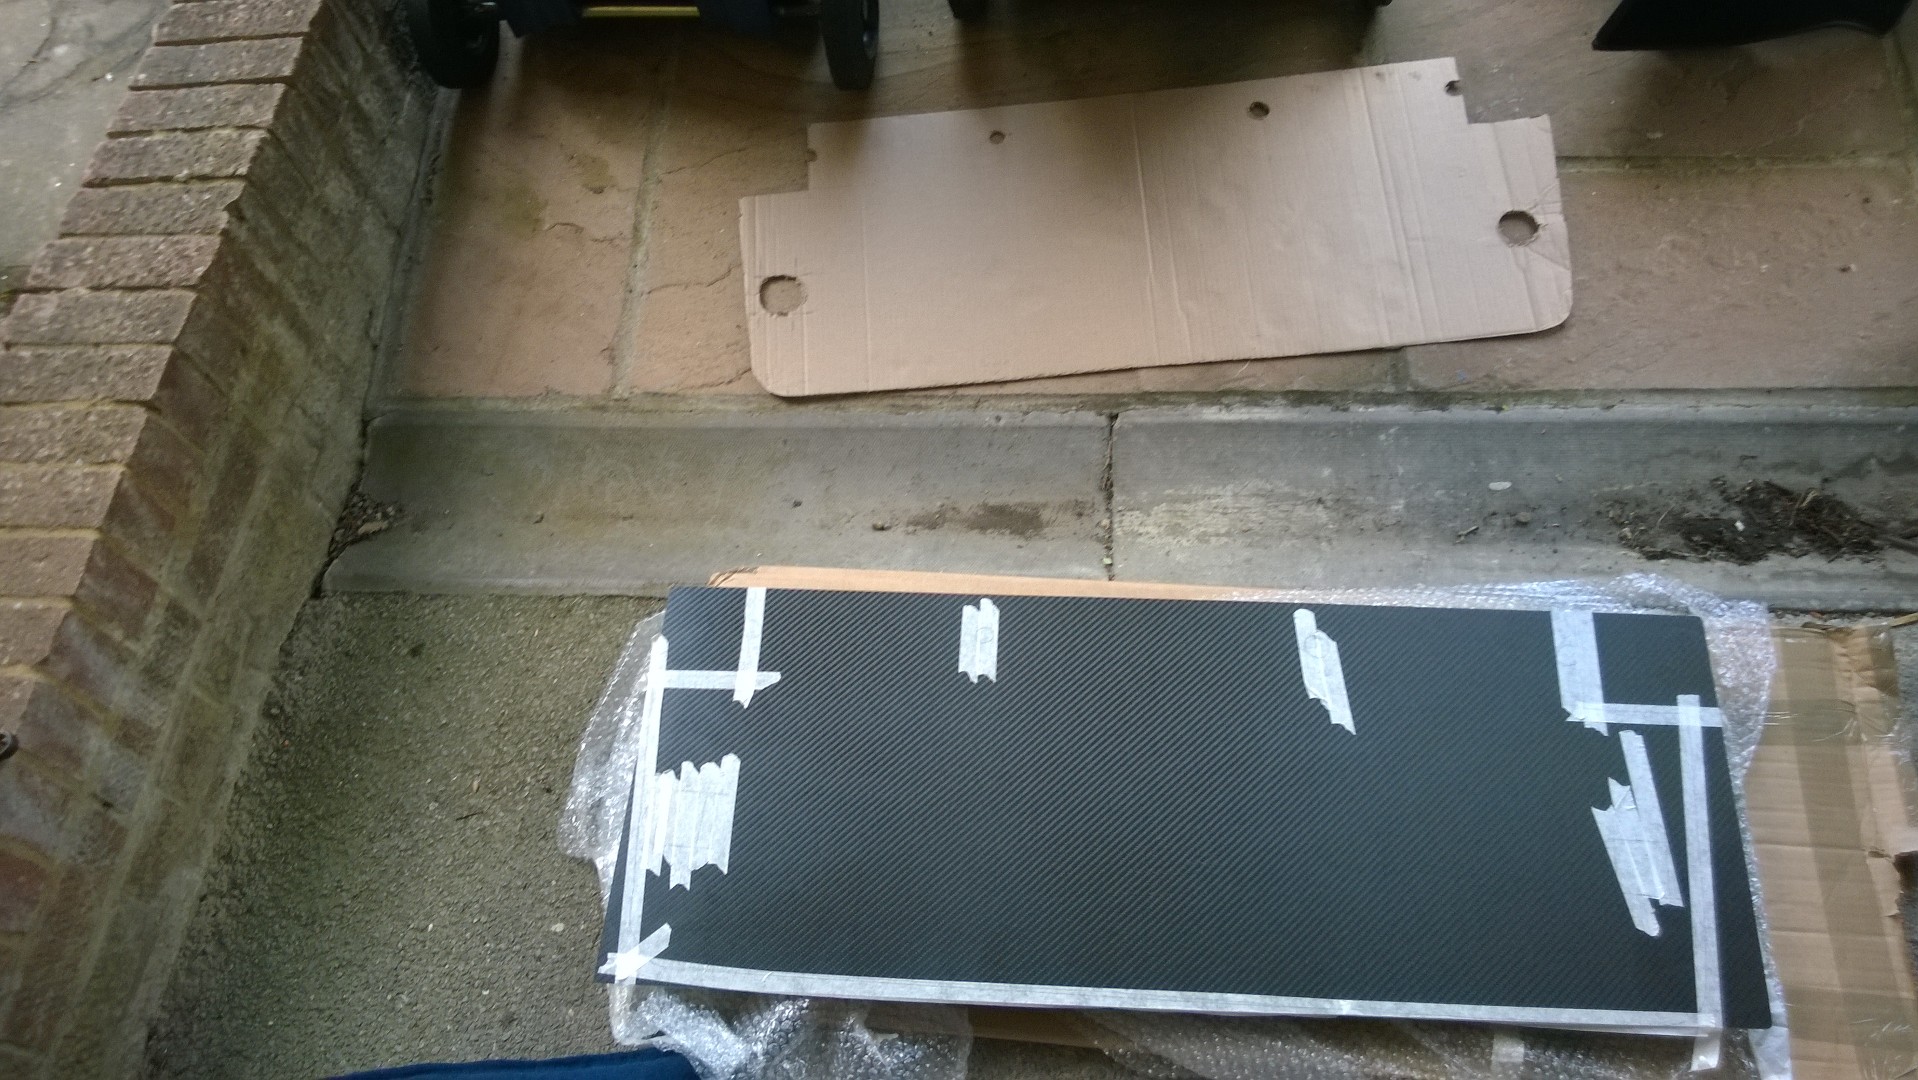
For the boot box/panel I toyed with a few options, cut up the stock bootbox, fit something complex, or what I settled on, a carbon flat panel – carbon nv did a wonderful job of putting a panel together, and I’ve taken the brave step of chopping it up to fit the car. Not before I made a foil (wife was out for this bit) and then a cardboard template.
Advice was permagrit bits and mask, gloves etc while cutting it, it is oddly quite satisfying to work with, rather like fibreglass, where as because it’s strong I kind of expected it to be harder, it’s not, it’s quite malleable.
Next steps are to cut the panel into 3 sections, 2 to fit around the rollbar diagonal, one to be a middle large access removable panel, that the makes fitting the rollbar easier, as of course the harness eyebolts need to go in at the same time – that’ll be fun!
Final thing – seats are on order from JK composites 🙂 should be with me in 2 weeks ish.
Before then I’d love to have the boot panel in, rollbar fitted, carpets fitted (they arrived eventually, no rush Westfield 🙂 )and electrics with a line drawn under them
Then the list will indeed be smaller. In not that long I need to think about when to book the IVA, especially if there is a 2 month wait. book the IVA, words I never thought id; say…


35+400 = 435
Well, what have I been doing on the car of recent? Wiring, and a lot of it. It’s gone from completely insurmountable to feeling like I’m breaking the back of it and 90% there – however, it’s felt like it’s been 90% for some time now, feel like I actually could be…
Bits of note? Removing wire, lots of it, tracing back and tracking, relying on the wiring diagrams (which have been pretty damn accurate).
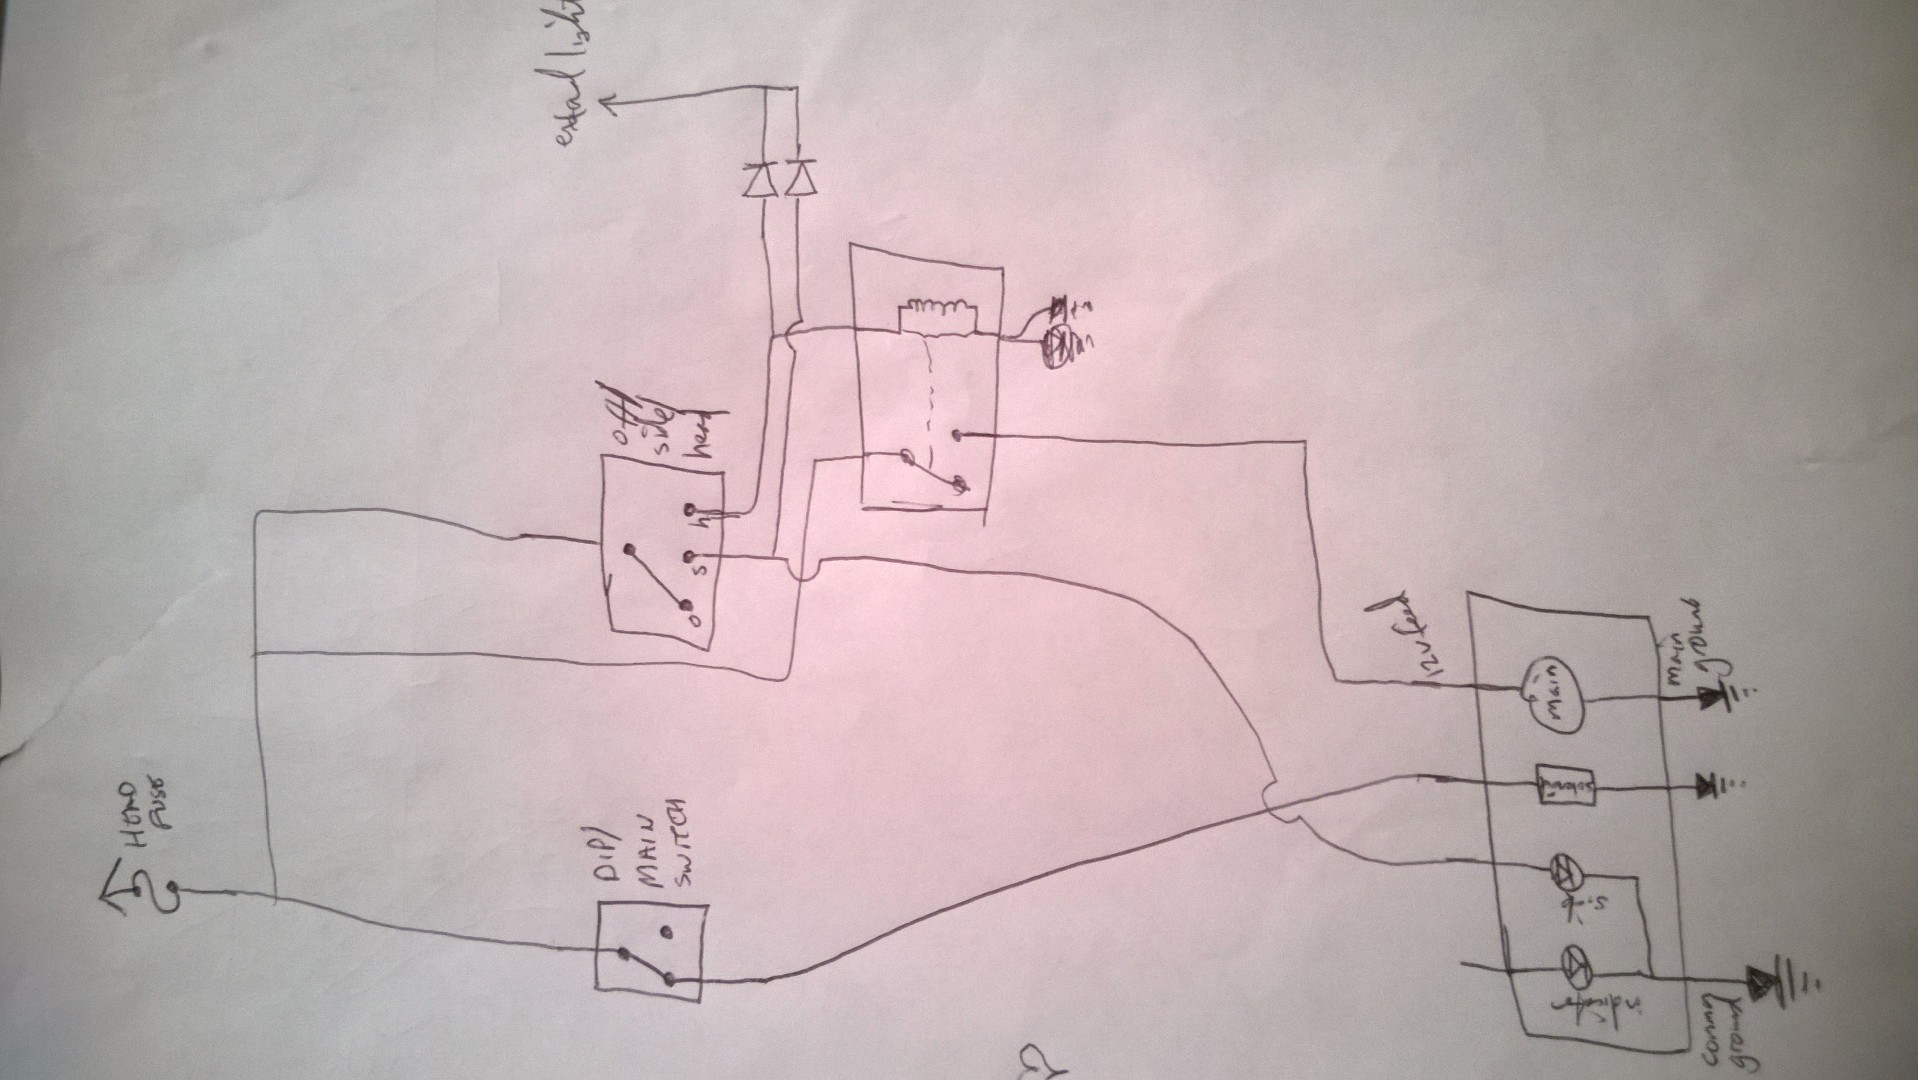
A few fun bits, getting the headlights working – a specific cause of pain was the main beam indicator light – the reason for the pain was the Venom headlights, and their solenoid that actuates the dipped/main beam – what it turns out is that switching a solenoid on and off causes a spike back of voltage – how do I know this? because it caused me to blow £10 worth of main beam LED indicator light – argh. With a lot of help from my pals Rob and Amit they pointed me to a “flyback” diode – quite a common solution apparently, and it’s done the job brilliantly.
Other fun? an ECU light, it turns out all UK cars didn’t have an ECU light on the dash – but I quite fancied one, however after a lot of research, it looks like I can take a feed from the diagnostic port on the car (not OBD II). Downside is that I have an ECU light that is permanently on unless I join some jumpers in the diag port – upside is I can disconnect it for most things, and run it depending on how I feel, not sure on it yet.
Final bit of oddity is the battery charge light – this would be really easy if I were using bulbs, bulbs you see accept current in either direction – I’m using an LED for my dash lights – they accept current in only one direction. I toyed with the idea of using a bridge rectifier to allow the battery dead, alternator ok OR battery ok, alternator dead to trigger the light, but after much fiddling and testing I’ve decided to just emulate the MX5 usage, just feeds off the alternator. Another thing I learnt is about exciting current of alternators – as I remove the bulb (and resistor) from the mx5 cluster there is no device to draw some current while the alternator starts doing its thing. So I’ve got the LED, but also a resistor in there to for some current to kick the alternator off. I have to thank WSCC and Mark Wendon again for some thinking and nudging along the plan!
Another nice Segway was the flasher unit indicator mod, well documented out there (did I even mention it already!?) needed to up the resistor to ensure the system can use LED indicators.
Right now…
I’ve the speedo to fit – thinking is to attach the hall effect sensor to the diff arm and read off magnets I’ll stick to a driveshaft. So need to fit this (bracket is done already), line up the wiring.
Then need to route the wiring for the heated screen – when this is done I should be about done with adding and fiddling with wiring.
Dare I say pretty much everything else seems to work, gauges, lights, switches, warning lights and so on.
then need to bundle up the wires up, locate all the oddies like fuseboxes and indicator switchboxes etc. Then tidy the wiring up under the bonnet.
Getting there – must say I’ll be pleased to see the back of the wiring – especially as I’ve a rollbar sat in the spareroom I’d love to fit!
Laura helped lots by the way… she likes a call out…


some piccies…
One final thing I forgot to share, the engine starts!
A few vids here, including checking the oil pressure with the coil disconnected
https://www.youtube.com/channel/UCQhfUMhcfnZ7jL-C5NAkCgQ/feed
43+357 = 400!
Yes, both hit my 400th hour (an accurate approximation) and here goes an update covering many months of build…
I will let the pictures speak all 26 of them, but a few areas of note:
Since I’ve had fluid in the rad I’ve had little puddles of water and drips on the rad fins – odd given it’s a car that’s done zero miles. After more drying, testing etc I bit the bullet that it was leaking on one of the cores – a call to WF to learn it was an out of warranty part (a reflection on build time I guess!?) – so a new rad 😦 refitted and lo and behold there are no more leaks – I can only imagine one time it had not enough antifreeze and expanded over a winter – hard to guess -either way, dry garage.
The rear end – built up over time, rear clusters first – as you can see I’ve chosen the traditional “trailer lights”. Appreciate they are a bit of a personal choice – but I quite like them. They’re up and running. The only error here was wiring the Side and Brake light the wrong way around – it transpires brake should be brighter than Stop – makes sense, but still managed to get the wrong way, a quick fix -thanks WSCC!
Fog and Reverse light are courtesy of playschool and some black moulded plastic housing – they are probably bigger than I thought but I quite like the look.
For what it’s worth the number plate light is a beast – a black sprayed aluminium LED unit. It was £26 when alternatives were far less, but it really caught my eye – don’t tell laura…
And the number plate – P138 LOA, that’s the donor car – for illustrative purposes only… after a few thoughts from WSCC I won’t give the plate a bracket etc – mount direct to tub.
Since I’ve trial fitted the bodywork I;ve done a bit of reading on fitting the nose cone, the default is bolts into the rivnuts in chassis – it was just a bit cumbersome IMO. I’ve since added Dzus slide latches to the two top nose cone mounts – another idea I’d steal from the forum!
Another little change is a bracket to allow the steering column around a bit – this should allow access to the ignition from just under the padded dash. Little mod, and easy when the drill penetrated the bracket I’ve used – hopefully will do the job.
Also an extra hole in the bodywork – a bit one for the exhaust manifold – there is no easy way (I’ve found) for getting this in the right place as you’re essentially measuring in 3 dimensions – ended up with a little cardboard template and a deep breathe. Optomistically I measured the square made by the 4 exhaust manifold branches(?) this was around 100mm x 100mm – so that’s the hole I drilled and opened. Then trying to manipulate the manifold into this it was clear that was never going to work – not with the engine in and the bodywork fixed(oh yes, I fixed the bodywork). Essentially I opened up the manifold up – mainly in the horizontal plane. The result is that it goes in and out, just. The result is also that when the manifold is in there is a little space either side, this just seems to be the way (unless you take the engine out, don’t fix the bodywork, or fit a surround).
What you may recognise in some of the pics is a padded dash. This may look familiar to those that follow other blogs, it’s KugaWesties previous padded dash. The plan is to switch to a flatter carbon dash post IVA, but with my option of VDO gauges they need recessing to meet radiusing.
Final work in the recent months is wiring. What can I say, it takes an age. A piece of the build I was really fearing but tobe honest I’ve rather enjoyed it- it’s made electronics knowledge from design tech A level worth it. So far I have removed 95% of the wires leaving the car. A few elusive ones, I’ve included a pic of the air conditioning connector, that was a mystery for a while (thanks WSCC – kugawestie again!). The dials are now on order and I guess the fun will begin adding headlights (going for all in ones(Venoms)) and wiring the dash.
That’s all for now!


50+327 = 357 hours!
Cancel the search party, I know it’s been 5 months but there has been some progress beyond where we were, as ever, limited by time, money and effort 🙂 currently time is the limiting factor – not that the other two are infinite!
So quite a lot has happened, I will try and revert back to blogging a little more regularly to save big updates like this, but stuff has moved on a tad – even had the engine turn over (without coil pack plugged and no fuel). More on that in a min…
Lots of pics and a few words, here we go!
So early Jan I made my second ever trip to WF in Kingswinford, the van was rented and I tripped up there on my tod while Laura looked after our little boy. For what it’s worth it was a long wheel base transit, and very nice I must say, I won’t be chopping in my 3 series touring, but I did get quite attached after a couple of hundred miles, surprisingly easy to drive – I digress.
Great to have the bodywork with me, it’d been 4 years in the waiting and was lovely to see the orange in the flesh – more importantly my orange in the flesh 🙂
Laura helped unload, some pics below, and quite a bit was squirelled in the house, only to move for inlaws.
So before the bodywork could be fitted there was some degree of process, a number of activities had to happen before I could proceed, this was my list:
Fit scuttle to fit locating blocks
Drill big grommet holes
Mark rivnut locations for drilling tub
Measure fuel fuller pipe length
Remove tub
Underseal front and rear arches (wait until brackets on for front)
Fit rear arches
Fit 2xsenders
fit coolant P clips
Fit wiring cable tie clips
Refit exhaust
Make exhaust template
Paint sanded bits with hammerite
Refit tub
Find location for expansion bottle, cut pipe
Find location for battery
Trial fit pedal cover panel/rivnuts
Re do angle of steering column with bracket etc
Re do air filter bracket
Refit scuttle
Fit nose cone
Ultimately… a lot of tasks depended on the bodywork being on, a lot needed to happen with no bodywork, and many fitted around this.
One key thing before getting the engine fired up is oil pressure, with no MX5 dash I couldn’t see if we had pressure, this has led to my VDO kit. So the gauges and senders are going to be the nice VDO set. An interesting(ish) nuance to this was the opinion of the IVA compliance for the gauges, ETB say no, Demon Tweeks say No, VDO say Yes – go figure, after a little thought I’m going to recess them into a padded dash (at the IVA stage), and perhaps go for a flatter dash in the future – cough.
So as part of testing the right sender and gauge – and testing my range of adapters you’ll see a squash bottle, kettle, Odyssey battery and some wire, just to test whether it all works with the required adapters.
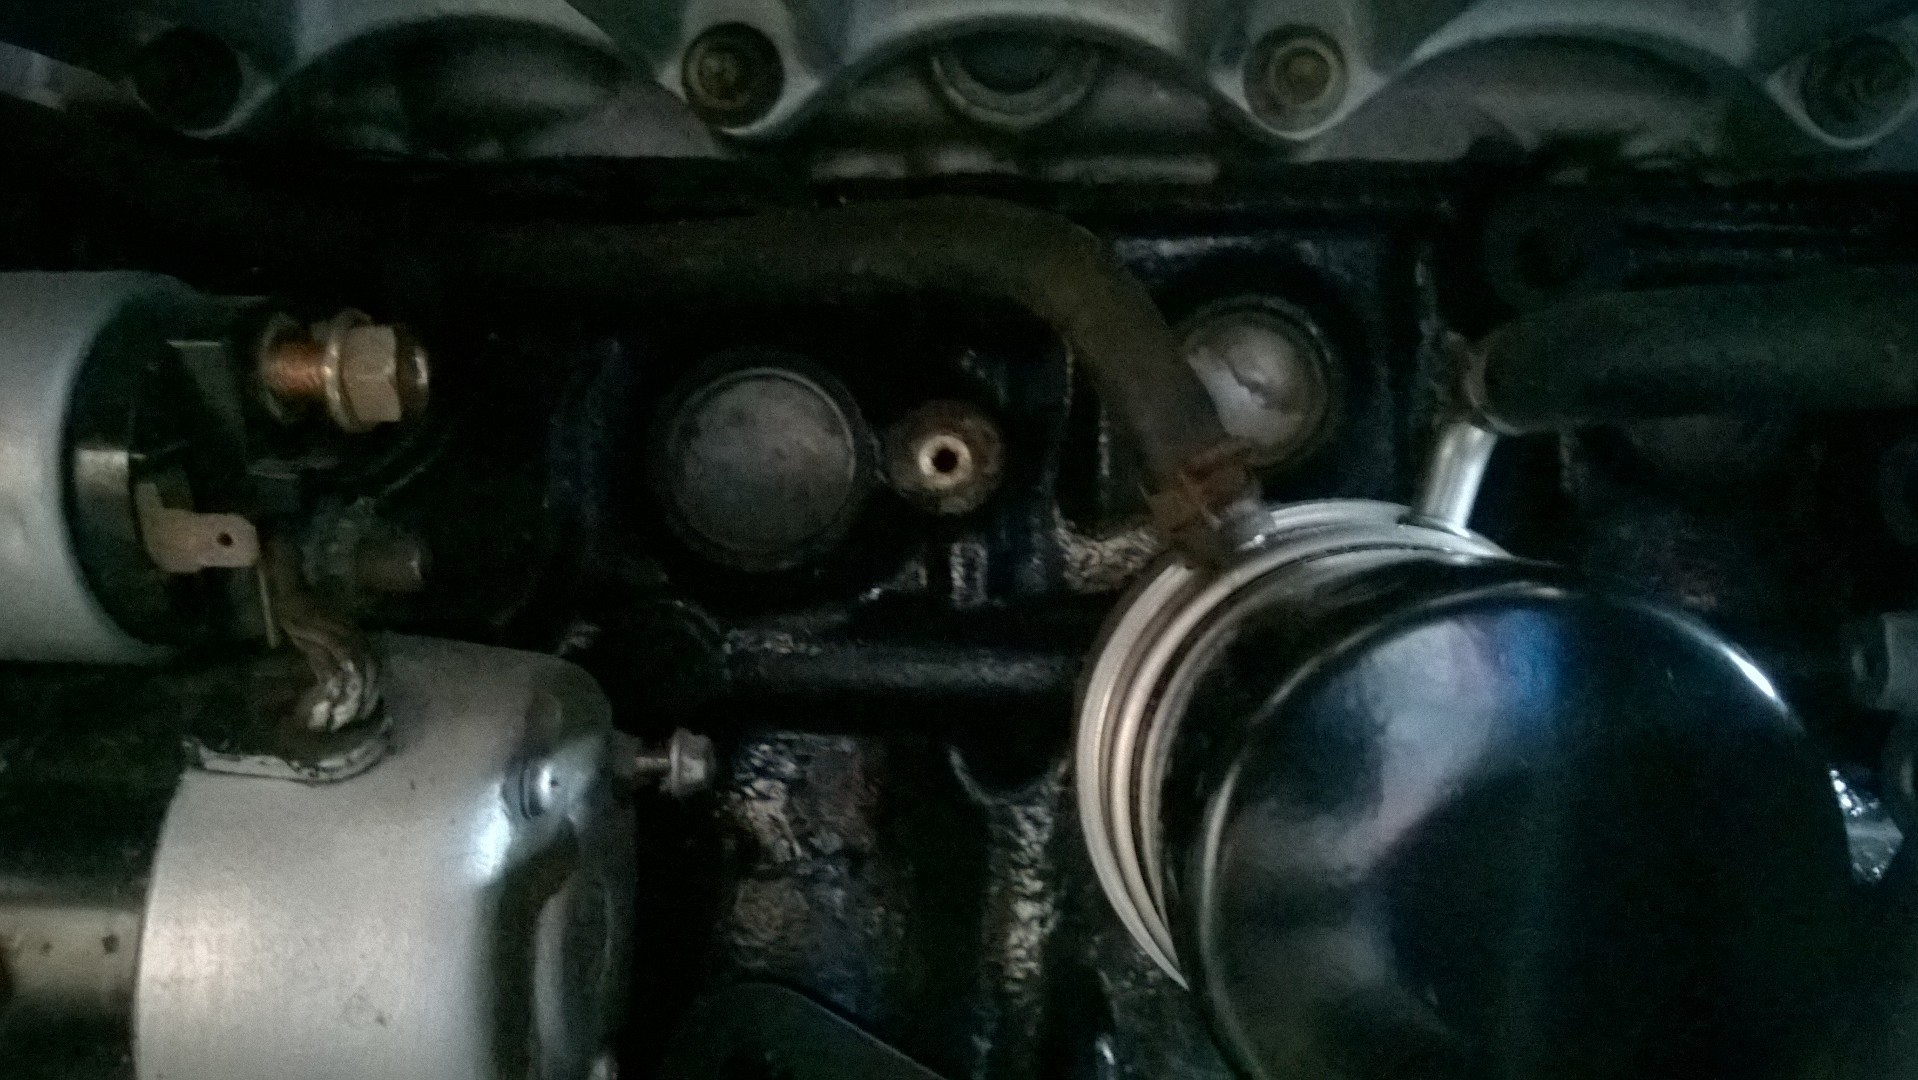
Onto the senders…
one for oil pressure, one for water temperature, in my case both used in the same position in the MX5 implementation.
Both are 1/8-27 BSP thread, apparently an odd thread given a Japanese manufactured car, hey ho, it is what it is.
So for the oil pressure sender that means a 1/8-27 BSP to 1/8 NPT convertor – more on that ******** in a moment.
For the water temperature sender it was a bit more complex, same 1/8-27 BSP to 1/8 NPT convertor – however, the VDO sender is too long to fit in the convertor, and can you find a longer convertor? Can you hell. After much searching this came from the States… not for this purpose, but after some dremmeling internaly has done the trick – hence the kettle and squash bottle testing though.
http://www.glowshiftdirect.com/transmission-test-port-extender.aspx
At this point Laura would like to add she counted the threads “on that sodding bolt” – she’s not wrong, distinguishing the difference between 27 and 28 threads per inch is a PITA. It also took an age to source the relevant bits, I’m sure A it’s easier when you know where and B there may be a better way.
At this point I ought add the nightmare I had with the 27 thread to 28 thread adapter for the oil pressure sender. This sender sits in the induction side of the block, not a thread I want to screw up with the engine in… With no torque settings to work with I fitted this adapter, at 20nM it was fine, with a bit of sealant in place I wanted no oil to leak. Just a little tighter, and lo and behold – ping. Off snaps half the adapter 😦 flush with the block too. After staring in disbelief for a few moments I thought “okay, it just needs turning left and it’ll come back”. After trying pliars, mole grips etc it quickly became evident it wasn’t budging. To stop the story taking longer to tell than the 5 or so hours I spent removing the blighter the eventual solution was stud removers with extension bars, this was further complicated because the stud extractors had a square end as they expect a tap/die on the end, no chance of space for that with enginer in situ and intake manifold on. Anyway, eventually it came out, much to my relief, a new one is in place, this time 10nM – that best do.
After much diddling it was bodywork time.
I have to say the finsh of the bodywork is really good, in most places there is not a lot of work required, I’ll only call out the bits where there was.
For me the massive amount of time was the scuttle hitting the dash hoop, I’ve talked about this already, and from WSCC it’s not uncommon, but I suspect a chassis build 4 years prior to the bodywork hasn’t helped matters. The end result was a lot of fettling of both the roll hoop and scuttle, decent fit eventually I hope.
Shut lines look reasonable with again a bit of jiggling, around 3-4mm.
Arches were pressy straight forward, fettling the locator blocks and 10x plastic number plate bolts, a nice rewarding job, only info I’d share here is not to overtighten (do I not learn!!?) the plastic bolts, finger tight with a socket seems to do, or the nuts skip a thread on the bolt.
The final bit i’d call out was fitting the final hose P clips (rubber lined of course and the loom holding clips. Now, this is clearly not that difficult on paper, drill holes, a bit of paint, then rivet – access is of course the issue. There are (thankfully) few things I’d do differently in the build – fitting these when I had no engine in would be 100 times easier.
Final, final bit was after all the bodywork on/off jobs the tub went on for the hopefully final time – thank you Laura, getting proficient at fitting the rear under the chassis! Nice to have it sat in place and a few rivets in.
There we are, that is what 2 – 3 hours a week for 5 months looks like at my pace!
Next up is some more main wiring, then shortly (asap) getting the engine firing. (Also hopefully getting a silencer (with CAT, need a CAT) from Lewis from WSCC tomorrow)
That’s all for now!


Another random (not proper post – proper ones will follow!) post of some pics of the dash hoop hitting the scuttle on the right hand side.
Getting some thoughts from the lovely people on WSCC – not great pics but you get the sentiment -pencil to demonstrate the gap (or lack thereof)


